Caulking Like a Pro: How to Get Those Practically Perfect-Looking Caulk Lines
August 21, 2024
As the trainer and founder of Sir Grout, a national hard surface restoration franchise, I have installed hundreds of caulk lines and have seen even more installed while training dozens of franchise owners and their technicians to perform our high-quality caulking service.
However, more and more homeowners want to learn how to install caulk by themselves, as this skill can save them from spending money on a professional residential caulking service. There are a few tricks of the trade on how to create the practically perfect caulk line. If you're a bit of a DIY geek or a DIY wannabe, I promise you will gain a skill that many top notch DIYers still struggle with.
If you are not a good caulker or you just plain suck at it, don't feel bad because I have seen many self- proclaimed professionals that have no idea how to handle a caulk gun. Keep reading, because help is here, and I promise you that if you follow my caulking steps to success, you will leave some of these professionals in your caulk line dust. Let's get started!

First, you must be working with a clean surface. Be sure that you have removed all of the old caulking from the area if any was present. I prefer to use two types of blades, a razor knife and a 4" window scraper. Using your razor knife, cut both sides of the old caulk line to release the old caulk. Don't press hard. Let the razor do the work. Use your 4" window scraper to remove excess caulking that you could not remove with your razor knife. Then, clean the area with rubbing alcohol. Alcohol is a great solvent to remove sticky substances, and it also dries quickly.
Before starting, you must first understand what to expect from your finished project. Remember, your caulk bead will follow the width of the gap you are filling. In other words, if your gap is big, your caulk line will be wide. If your gap is thin, your caulk line should be thin. Your caulking should be as least noticeable as possible. Again, your bead should be indicative of the gap you are filling.

Before I get into the process, let me say that I shake my head when I walk through the aisle of home improvement stores and see all of the caulking gadgets that promise a perfect caulk line. Much like the gadgets golfers buy with the hope of improving their game, these gadgets rarely improve your caulking skills. Follow these simple steps and you too can walk by the caulking gadgets with a smirk on your face.
Here is what you will need:
Caulk (I prefer GE silicon)
Caulking gun
Grout sponge
Bucket of clean water
Your index finger
Step 1
Make sure the area you are caulking is clean and dry.

Step 2
Cut the tip of the caulk tube on a 45-degree angle (it's OK if it's not 45 degrees). You can use a utility blade, scissors, or the cutting tool on your caulk gun if it has one. I'm often asked how big the hole should be. The answer is, as wide as necessary to fill the gap you are filling. However, it is OK if it is too big or too small. The fact is, you just need to fill the gap with caulk. The next few steps will make it look beautiful.
Step 3
Puncture the membrane in the caulk tube using the membrane rod on your caulk gun if it has one, or use any long thin object that will reach the membrane, like a wire hanger. This is often a step that is forgotten by new caulkers. If the membrane is not punctured, it is hard to pull the trigger on the caulking gun. Many people force it, and they either get lucky and the membrane pops or they end up blowing out the bottom of the tube and caulk comes flowing out of the bottom of the tube, which can cause quite a mess.
Step 4
Place the tube in the caulk gun. If you are doing a vertical line, always start from the top and work down. If you are doing a horizontal surface, start with whatever side you are comfortable with. Slowly squeeze the trigger on the gun as the caulk releases from the tube. Move the tip of the tube at a pace that will allow caulk to fill the gap. Do not be overly concerned with how good it looks. Just fill the gap. If the caulk starts falling out of the gap, press it in with your finger.


Step 5
Once the gap is filled, dip your index finger in your bucket of water. Using a wet finger, slowly smooth out your line. If excess caulk comes off on your finger, clean it off in your bucket. Re-wet your finger and finish smoothing out your line. Don't worry if it's not beautiful. We are almost there.
Step 6
Here is the part that will separate the ugly caulk lines from the pretty ones. Take your grout sponge and wet it in your bucket. Be sure to wring it dry. It should be slightly damp, not wet. Using the corner of the sponge, lightly (like you are petting a dove) wipe the line in a downward motion. You should be doing this in a continuous motion. Up and down. Up and down. This is referred to as "cutting the line." As the corner of the sponge accumulates excess caulking, switch to another corner. When each corner of your sponge has excess caulk, clean it off in your bucket. Continue this step until you have a clean and even line. The amount of excess caulk you applied will dictate how much "cutting of the line" you will do.

Step 7
Clean off any excess caulk that you see on tile or nearby surfaces.
Step 8
Step back and admire your handy work. Congratulations! You are the proud owner of a practically perfect caulk line.
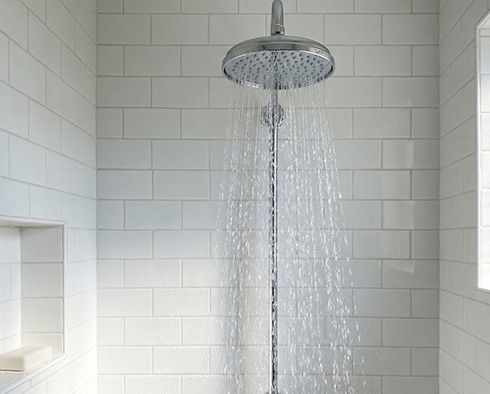
Caulking is a valuable DIY skill that is often used around the house. Tubs, showers, windows, steps, cracks in concrete and wood all need re-caulking on a regular basis. The ability to caulk well can save you thousands of dollars in water damage. Put your new-found skill to use! Your home and your wallet will thank you.
If you would rather hire professionals to do it for you, Sir Grout's caulking service is just what you need! Call us at (866) 476-8863 or click on the "Schedule a Free Quote" button on this page, and we will gladly assist you. Subscribe to our newsletter to stay up to date with our news and tips.
Don't Miss These Other Must Read Articles